Wednesday, October 30, 2013

Princess Merida - Part 3

I'm so excited to show you the pictures of the finished dress! I might be squealing! Okay, I'm actually sitting here quite sedately... ask my assistant if you don't believe me! But I'm terribly excited because the dress turned out so well and my customer sent me some awesome action shots which you'll see further down...


I am just so in love with this style of dress. I should maybe make one for myself...?


Doing lacing up the back like that and getting it to lay straight and even is fussy... my inserts with boning seem to have done the trick though!


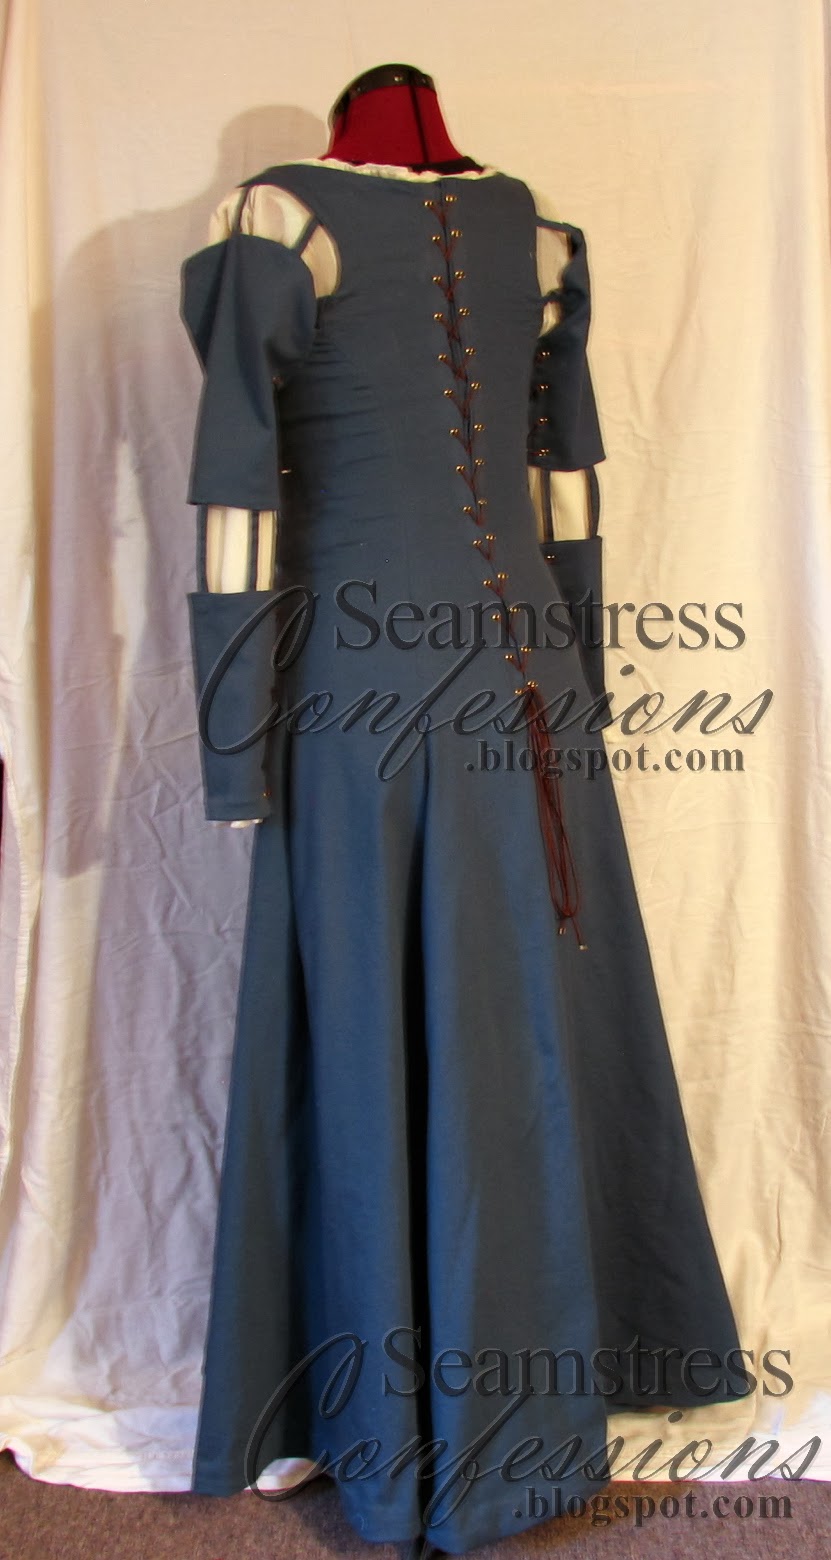
The eyelets took forever. And of course I was in the middle of doing them when I got my wasp sting on my right hand, and the last thing I could do was wield a hammer. My customer had to be a bit more patient than expected due to this delay... but thankfully I'd allowed plenty of time to get it done!


Photo by Joseph Moulton
And here she is! The fearless Merida!
Photo by Joseph Moulton
I am so ridiculously thrilled to see one of my costumes used in such an authentic photoshoot. (This isn't really Scotland but it sure looks like it!)

Photo by Joseph Moulton
Isn't she fantastic?
Photo by Joseph Moulton

Photo by Joseph Moulton


Would you like to commission your own costume? Check out my commission guidelines here!

Monday, October 28, 2013

Princess Merida - Part 2


Here you can see the upper half of the sleeves, with interfacing to reinforce the sides where eyelets will be inserted for lacing.


Adding interfacing to the neckline facing.


Here you can see the neck facing, as well as the inserts for the back-up lacing. There is a length of boning in each of the insets to keep the back laying flat.


Making tons of little tubes to join the sleeves together!


Measuring out the spaces carefully so the sleeves hang evenly.


Each tube was stitched into the seam allowance for stability, then the seam was closed with invisible hand stitching.


Here you can see how the insets have been sewn in and the eyelets added to the back. Stability, modesty and practicality!


Making that neck slit was pretty tricky, and we ended up hemming the top and reinforcing the bottom with some soft silky hem tape.

Ready to see the final pictures? Check out Part 3!

Thursday, October 24, 2013

You're never too young (or too old!) to enjoy a good costume!

Merida is still coming, but first I wanted to take the time to share this beautiful link with you. 50 girls wearing mighty costumes, from princesses to scientists to Darth Vader. Say what? See for yourself! 

I think my sister and I would have fit right into that line-up when we were all little and adorable. What do you think?

This was back before the Star Wars prequels came out, so Princess Leia was the only girl in the movies. My little sister wanted to be a Star Wars princess too, so we invented a little sister for Luke and Leia - Princess Molly.

(Halloween up north is COLD.)


Wednesday, October 23, 2013

Princess Merida - Part 1

With Disney princesses being some of the most popular cosplays out there, I knew it was only a matter of time before I got an order to replicate one of their dresses. (I've done "Once Upon a Time" pieces and a Cinderella Pin-Up, but not an exact replica).

Reference Photo from Customer

I was super excited to get this Merida commission. This Pre-Raphaelite style is one of my favorite to create and I love the long graceful lines of Merida's dress, not to mention the awesome underdress ruffling at the sleeves! My customer was very involved in determining all of the details, and sent me a long list of photos both from the movie and from other cosplays, pointing out what she did and didn't like about each of them. This was incredibly helpful!


This is the fabric we went with. It's a bit light and not quite green enough in this photo (and I did color tweak it), but you can get an idea of how it looks. It's actually a fashion denim, which is not what I would have expected to pick for this dress, but finding a good linen proved difficult and expensive, so we decided to go with the denim. I knew that the high cotton content would make it easier to care for, and the stretch aspect would make it more comfortable.


Above is the photo I took with it to give my customer an idea of how it draped.


here is a mock-up of the sleeve I did to ensure that the undersleeve was full enough. I didn't have quite enough of the fabric to make it as full as I'd originally intended, but when my customer saw these pictures she assured me that all was good.


The underdress was made from a thin cotton voile I found in the home decorating department at JoAnn Fabrics.


Here I've pinned the overdress pieces onto the form to get an idea of how it would all come together.


Here you can see how I gathered the neck. Basically I gathered along the hemline and then stitched over it again to secure the gathers in place.


For the sleeves, however, I included elastic so they'd have some give.


The underdress was very basic - thankfully! It definitely needed to have every edge serged, as it wanted to fray terribly.


Here the first seams are sewn! I ended up pinning them in a bit more to create (per my customer's request) more fitted through the hips than an A-line.

Check out Part 2!

Monday, October 21, 2013

How to make a Ripple Skirt in 2 Hours

I have been a bit more inspired lately to try to make extra time to do some sewing for myself in addition to all of the money-making ensembles I've been recreating for the past two years.


This was an awesome piece of embroidered cotton voile that I've had in my stash for years. I've been wanting to do something with it for ages, but just never had the time. Last week I got tired of putting it off and decided to pull it out... above I've laid out the two and a half yards.


I decided I wanted a long narrow skirt with a long ruffle on the bottom. So I measured down as far as I wanted the straight part, and then cut the remainder in half for the ruffle.


Because the voile is sheer, this skirt needed an underskirt. So I cut out a piece of lining fabric the same size as the larger voile piece.


Then I serged everything!!! I went with white thread because that's what I had...


...but I used a narrow hem stitch in dark brown to finish the edge of the ruffle.


Then I gathered the top of the ruffle.


I sewed the large voile and lining pieces up at the side to create two tubes, then I pinned and sewed the tubes together at the top. The ripple voile, if stretched out, would be larger than the lining, hence the pinning and stitching to get it all to the same size without the voile stretching.


I then folded that top edge inwards and created three channels for elastic.


Elastic waistband!


I stitched the ruffle in, serged the edges again to keep it as neat and tidy as possible, and put a narrow hem on the bottom of of the lining.


And after two hours of work I had this gorgeous skirt!

I have fairly narrow hips - if your hips measure more than 40 inches, you are going to want more fabric to create this skirt, as you'll need to cut the top in two pieces. Or if you're going with a non-directional piece you can just buy your hip+ease and the extra for the ruffles. The nice fit of this skirt does come from the ripple voile, though, so I do advise finding something similar.

Saturday, October 19, 2013

Red Cloak Variation


This is an example of a variation I can do on Red's cloak to make it more affordable. Instead of going with the exact fabric ($25 a yard when you include shipping), I found a pretty but cheaper velveteen for this client. The back turned out rather interesting because I didn't cut it exactly how I would normally do a cloak and had to play around with it... lesson learned! It still works as a nice cloak, it's just not as perfect as I could have wished. 

Wednesday, October 16, 2013

Sailor Moon Queen Serenity - Part 2

What's the story behind this piece? Check out Part 1!


This was a next-to-final picture I sent my customer to confirm everything about the costume before I stitched on the bows. She was happy with everything except for the shape of the chiffon bow in back and asked if I could starch it so that it contrasted better with the back of the dress.


On this picture you can see a slight rippling on the center back profile. This was a difficulty with the bias cut - it was very hard to get the zipper to lay flat with the way the fabric was pulling. For a future version of this dress I would not bias cut it - or at least not the underdress, and I'd use boning to create more structure.


And here is the finished dress, photographed nicely against some lilac fabric I had around...


Look at that skirt!


See how the back bow stands out better now that it has been starched?


To starch the back bow, I mixed starch and water in a spray bottle and sprayed it onto the bow, which I'd hung from a clothesline. It took two applications to get the bow to the desired stiffness.


The bow is sewn down on one side of the zipper, and attaches via hook and eye on the other.


Two hooks and eyes hold the top of the dress closed.


A closer look at the upper front.


Everything at once!