Monday, December 23, 2013

Updates on Life and Commission Queue

I'm alive! I actually just finished the final commission I will ever create under my maiden name. In just 24 days I'll be marrying this handsome fellow...


... and become "Mrs. Elizabeth Hajek."


In the meantime most of my sewing is going to go towards making this apartment a bit more homey. Here's a peek at the evolving living room... there's a bedroom and a sewing room to decorate as well!!! (My own sewing room at last... SO excited!)

It's been a pretty crazy couple of weeks since I've been under the weather (more so than I've been in quite awhile, but we should have it sorted), and then of course Christmas shopping. Plus wedding planning gets ever more crazy as we discover even more details to manage. Ack. Very glad that the commissions are done for now.

SPEAKING OF WHICH.

Important commission queue info!!!

I will be OPENING THE COMMISSION QUEUE when I return from my honeymoon. I'm estimating this to be either the 27th or 28th of January, but will nail down a specific date and time as we get closer. Stay tuned!

Saturday, December 7, 2013

I'm moving!

It kind of comes with the territory when getting married, but of course it's an added bunch of crazy when "home" is also "work." A lot of my stuff is sewing related and therefore can't be moved until I'm ready to move too - or at least have completed the final commissions. (And a few Christmas presents!)

I'm trying not to be stressed by the weight of everything. I want to enjoy this time of preparation and transition. Moving into the new apartment and getting everything all set up is pretty fun - but I get a little overwhelmed by just how much there is to do in the next 40 days.

Anyhow, my continued thanks for everyone's patience with the lack of updates on this blog (and e-mail responses!). I promise that once I get back from my honeymoon I'll be back to being properly prompt. I will try to answer the waiting e-mails over the next week, but I've learned I can't really predict what is going to demand my time next, alas! Stay tuned for updates!

Wednesday, December 4, 2013

My Downton Abbey Bridal Shower Costume

My mother-in-law (to be!) threw me a gorgeous bridal shower last Saturday - a Downton Abbey Tea Party! She even asked all the guests to come in costume! Ironically (for all my love of the show) I had not yet created an Edwardian or Victorian gown for myself, and knew I'd have to do some last minute sewing to get something done in time. 


Thankfully my awesome sister-in-law (to be) gave me this gown which I was able to use as a base. Not having to sew and hem the skirt make it all a ton easier! The bodice wasn't going to fit right, so I simply chopped it off, removed the waistband and took out the zipper.


Then I put it on my dress form and adjusted the waist darts slightly. (Please forgive the poor camera quality, I did the whole project in one evening and was just taking snapshots with my phone)


I didn't have time to mess around with a pattern, so I just took some fabric from my stash and started pinning it to the dress form, marking darts and cutting away excess fabric.


After getting the underlayer done, I took some chiffon, serged the edges, and pinned it down the front in the trademark Edwardian 'v'.


I stitched the chiffon down, then used a zigzag stitch to attach a piece of black brocade to the center inset.


I then used some thin velvet trim to cover the seams.


More pinning to bring the edges of the chiffon into the waistband and sew the sleeves.


I also had enough chiffon to make a quick and simple overskirt, which I quickly hemmed with black thread and a narrow stitch on my serger.


For all my hurrying, I wasn't able to get quite everything done on the machine on Tuesday night, and spent some time handsewing the zipper and waistband after we'd reached my in-laws (to be).


To finish the ensemble, I added a necklace from my sister-in-law (to be) and my dear friend Amanda curled and pinned my hair in a Downton Abbey style we found on Pinterest. I also added a camisole under the dress for further modesty. The waistline got a bit higher than I'd originally wished, but for such a hastily thrown-together dress, I think it turned out very well.


Opening shower gifts with Nathan :)


A better look at the whole dress.


A look at the dress from the side, in action! (Also you can see the red velvet gloves, another accessory on loan from my sister-in-law-to-be).

Update: In January, 2017, for our third wedding anniversary, we got to visit the Downton Abbey Costume Exhibit at the Mall of America. Check out my write-up on the experience here!

Tuesday, December 3, 2013

Stuff to Read

Two wedding showers, Thanksgiving, 9 hour drive each way to visit my fiance's family... it's no wonder that my body is shot and I'm spending today recuperating.

Want some fun browsing? Check out this post: http://diy.allwomenstalk.com/best-blogs-for-refashioning-your-clothes

Wednesday, November 13, 2013

Downton Abbey Costumer Interview

Season 4 of Downton Abbey isn't out in the US yet, but if you live in the UK or have found a way to watch it online, you might enjoy this interview with the show's costumer.

(I'll be doing a full in-depth post on all the costumes of season 4, but likely not until after my wedding when the show is actually airing in the US.)

Tuesday, November 12, 2013

There's this thing called a "Wedding"

Well, we're at the point where wedding planning and preparation has really taken over my life. I'm still working on some pieces for clients, but I find that keeping up the blog grows more and more difficult as we get closer to the big day (January 17th!!!). This is especially true because there are a lot of things I've been doing myself - thank you cards, thank you gifts, place cards - and then there are just tons of little things to do for a wedding that you don't even realize until you're in it. Keeping track of RSVPs, finding the right florist, the right baker, the right music -

Anyhow. I'm still completely dedicated to this blog, I just might be a little thin on content for the next two months and two weeks. Thank you for your patience! (and don't worry, I'll be sharing wedding pictures. I'm sure some of you are very curious to see what I've chosen as a wedding dress!)

Tuesday, November 5, 2013

Mini Marie Antoinette

Oh man oh man oh man.

This is probably the most elaborate halloween costume I've ever seen on a kid this small. Wow. This is one dedicated mom!

I have to say I love that in this case "Princess" = "Marie Antoinette." How often do you get a kid's princess costume that's not just shine and cheap velvet? This Robe a la Francaise is exquisite, and the photos detailing the process and the finished product are fantastic.

I'm really looking forwards to sewing costumes for my own kids someday, but I don't think they'll ever get 72 hours spent on one piece that they'll grow out of in three months. However, if I did ever make something this intricate for them, I'd want to make sure we do what this mom did and get the finished product properly photographed. Can you imagine having these pictures of your little darling forever? Now THAT would be a keepsake!

Wednesday, October 30, 2013

Princess Merida - Part 3

I'm so excited to show you the pictures of the finished dress! I might be squealing! Okay, I'm actually sitting here quite sedately... ask my assistant if you don't believe me! But I'm terribly excited because the dress turned out so well and my customer sent me some awesome action shots which you'll see further down...


I am just so in love with this style of dress. I should maybe make one for myself...?


Doing lacing up the back like that and getting it to lay straight and even is fussy... my inserts with boning seem to have done the trick though!


The eyelets took forever. And of course I was in the middle of doing them when I got my wasp sting on my right hand, and the last thing I could do was wield a hammer. My customer had to be a bit more patient than expected due to this delay... but thankfully I'd allowed plenty of time to get it done!


Photo by Joseph Moulton
And here she is! The fearless Merida!
Photo by Joseph Moulton
I am so ridiculously thrilled to see one of my costumes used in such an authentic photoshoot. (This isn't really Scotland but it sure looks like it!)

Photo by Joseph Moulton
Isn't she fantastic?
Photo by Joseph Moulton

Photo by Joseph Moulton


Would you like to commission your own costume? Check out my commission guidelines here!

Monday, October 28, 2013

Princess Merida - Part 2


Here you can see the upper half of the sleeves, with interfacing to reinforce the sides where eyelets will be inserted for lacing.


Adding interfacing to the neckline facing.


Here you can see the neck facing, as well as the inserts for the back-up lacing. There is a length of boning in each of the insets to keep the back laying flat.


Making tons of little tubes to join the sleeves together!


Measuring out the spaces carefully so the sleeves hang evenly.


Each tube was stitched into the seam allowance for stability, then the seam was closed with invisible hand stitching.


Here you can see how the insets have been sewn in and the eyelets added to the back. Stability, modesty and practicality!


Making that neck slit was pretty tricky, and we ended up hemming the top and reinforcing the bottom with some soft silky hem tape.

Ready to see the final pictures? Check out Part 3!

Thursday, October 24, 2013

You're never too young (or too old!) to enjoy a good costume!

Merida is still coming, but first I wanted to take the time to share this beautiful link with you. 50 girls wearing mighty costumes, from princesses to scientists to Darth Vader. Say what? See for yourself! 

I think my sister and I would have fit right into that line-up when we were all little and adorable. What do you think?

This was back before the Star Wars prequels came out, so Princess Leia was the only girl in the movies. My little sister wanted to be a Star Wars princess too, so we invented a little sister for Luke and Leia - Princess Molly.

(Halloween up north is COLD.)


Wednesday, October 23, 2013

Princess Merida - Part 1

With Disney princesses being some of the most popular cosplays out there, I knew it was only a matter of time before I got an order to replicate one of their dresses. (I've done "Once Upon a Time" pieces and a Cinderella Pin-Up, but not an exact replica).

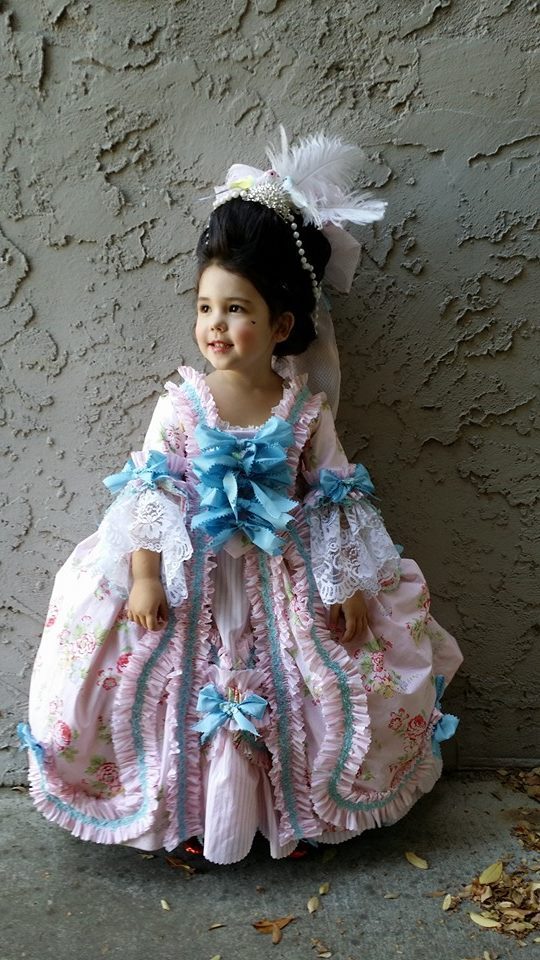
Reference Photo from Customer

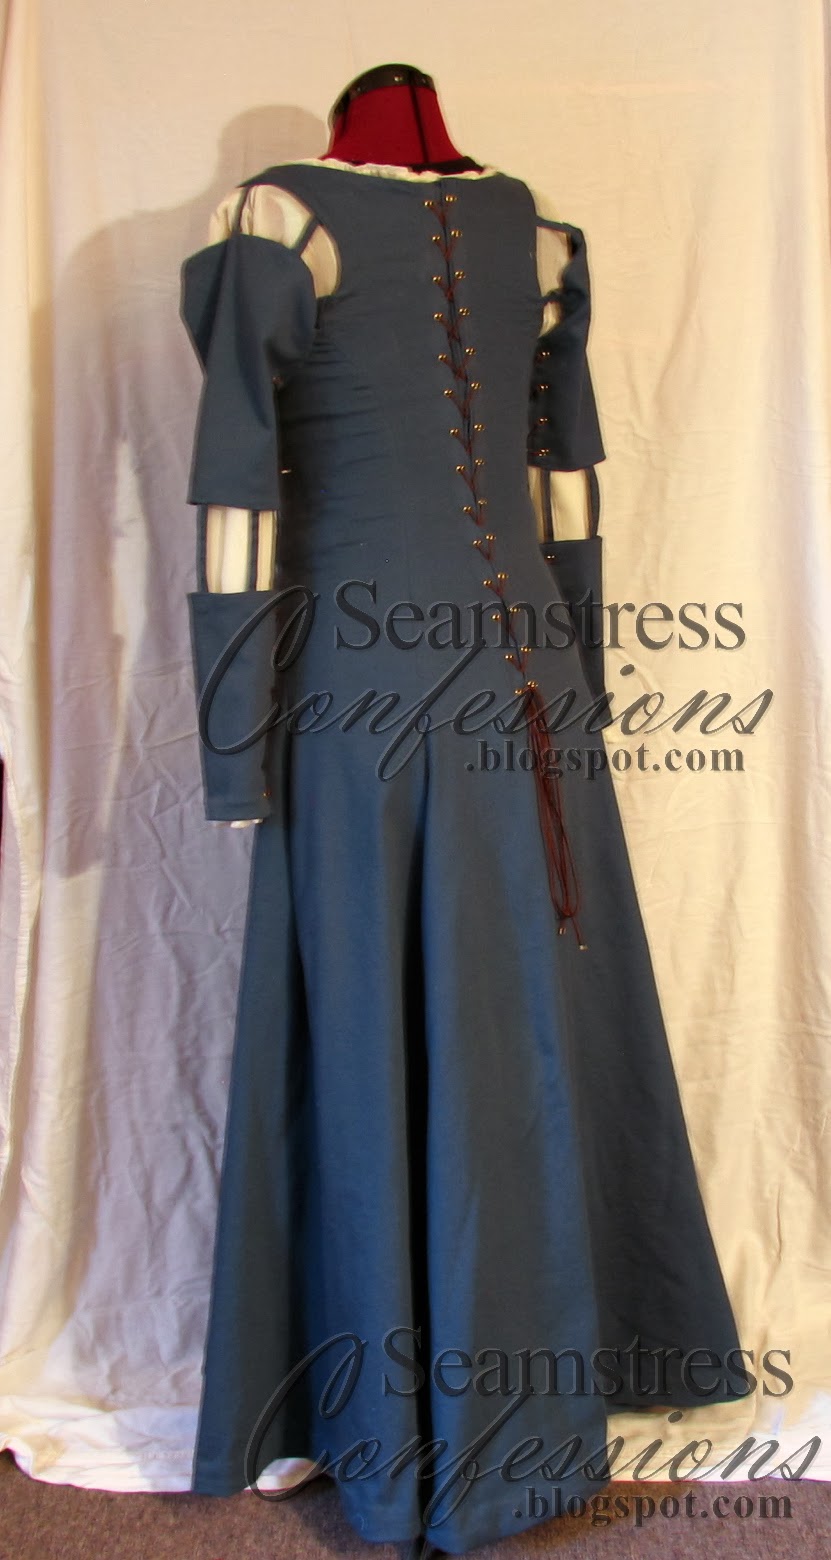
I was super excited to get this Merida commission. This Pre-Raphaelite style is one of my favorite to create and I love the long graceful lines of Merida's dress, not to mention the awesome underdress ruffling at the sleeves! My customer was very involved in determining all of the details, and sent me a long list of photos both from the movie and from other cosplays, pointing out what she did and didn't like about each of them. This was incredibly helpful!


This is the fabric we went with. It's a bit light and not quite green enough in this photo (and I did color tweak it), but you can get an idea of how it looks. It's actually a fashion denim, which is not what I would have expected to pick for this dress, but finding a good linen proved difficult and expensive, so we decided to go with the denim. I knew that the high cotton content would make it easier to care for, and the stretch aspect would make it more comfortable.


Above is the photo I took with it to give my customer an idea of how it draped.


here is a mock-up of the sleeve I did to ensure that the undersleeve was full enough. I didn't have quite enough of the fabric to make it as full as I'd originally intended, but when my customer saw these pictures she assured me that all was good.


The underdress was made from a thin cotton voile I found in the home decorating department at JoAnn Fabrics.


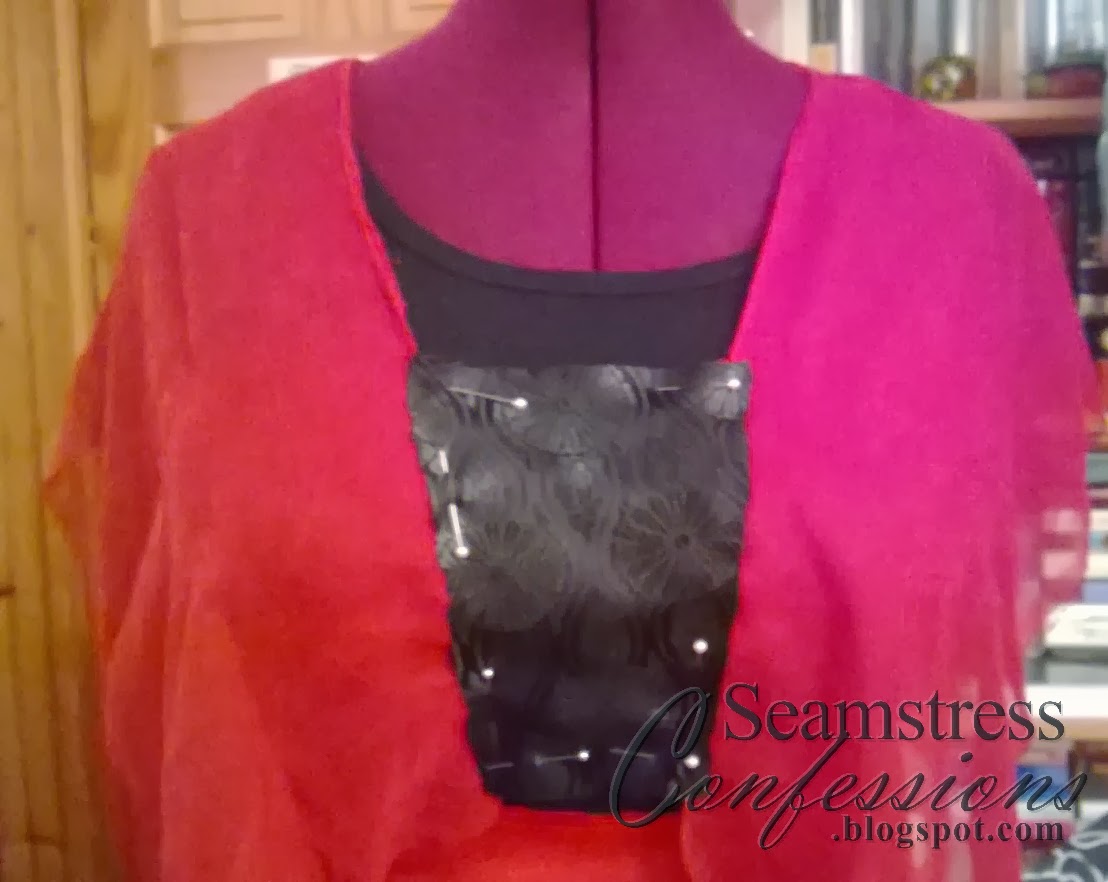
Here I've pinned the overdress pieces onto the form to get an idea of how it would all come together.


Here you can see how I gathered the neck. Basically I gathered along the hemline and then stitched over it again to secure the gathers in place.


For the sleeves, however, I included elastic so they'd have some give.


The underdress was very basic - thankfully! It definitely needed to have every edge serged, as it wanted to fray terribly.


Here the first seams are sewn! I ended up pinning them in a bit more to create (per my customer's request) more fitted through the hips than an A-line.

Check out Part 2!