Friday, March 28, 2014

Belle Gold Part 3

I'm always thrilled when I get photos from my happy customers of their costumes in action, because it doesn't always happen. Most people are pretty generous about sharing their snapshots though, and I've had a few customers e-mail me with photos quite some time after receiving the product - always a happy surprise when I check my inbox!

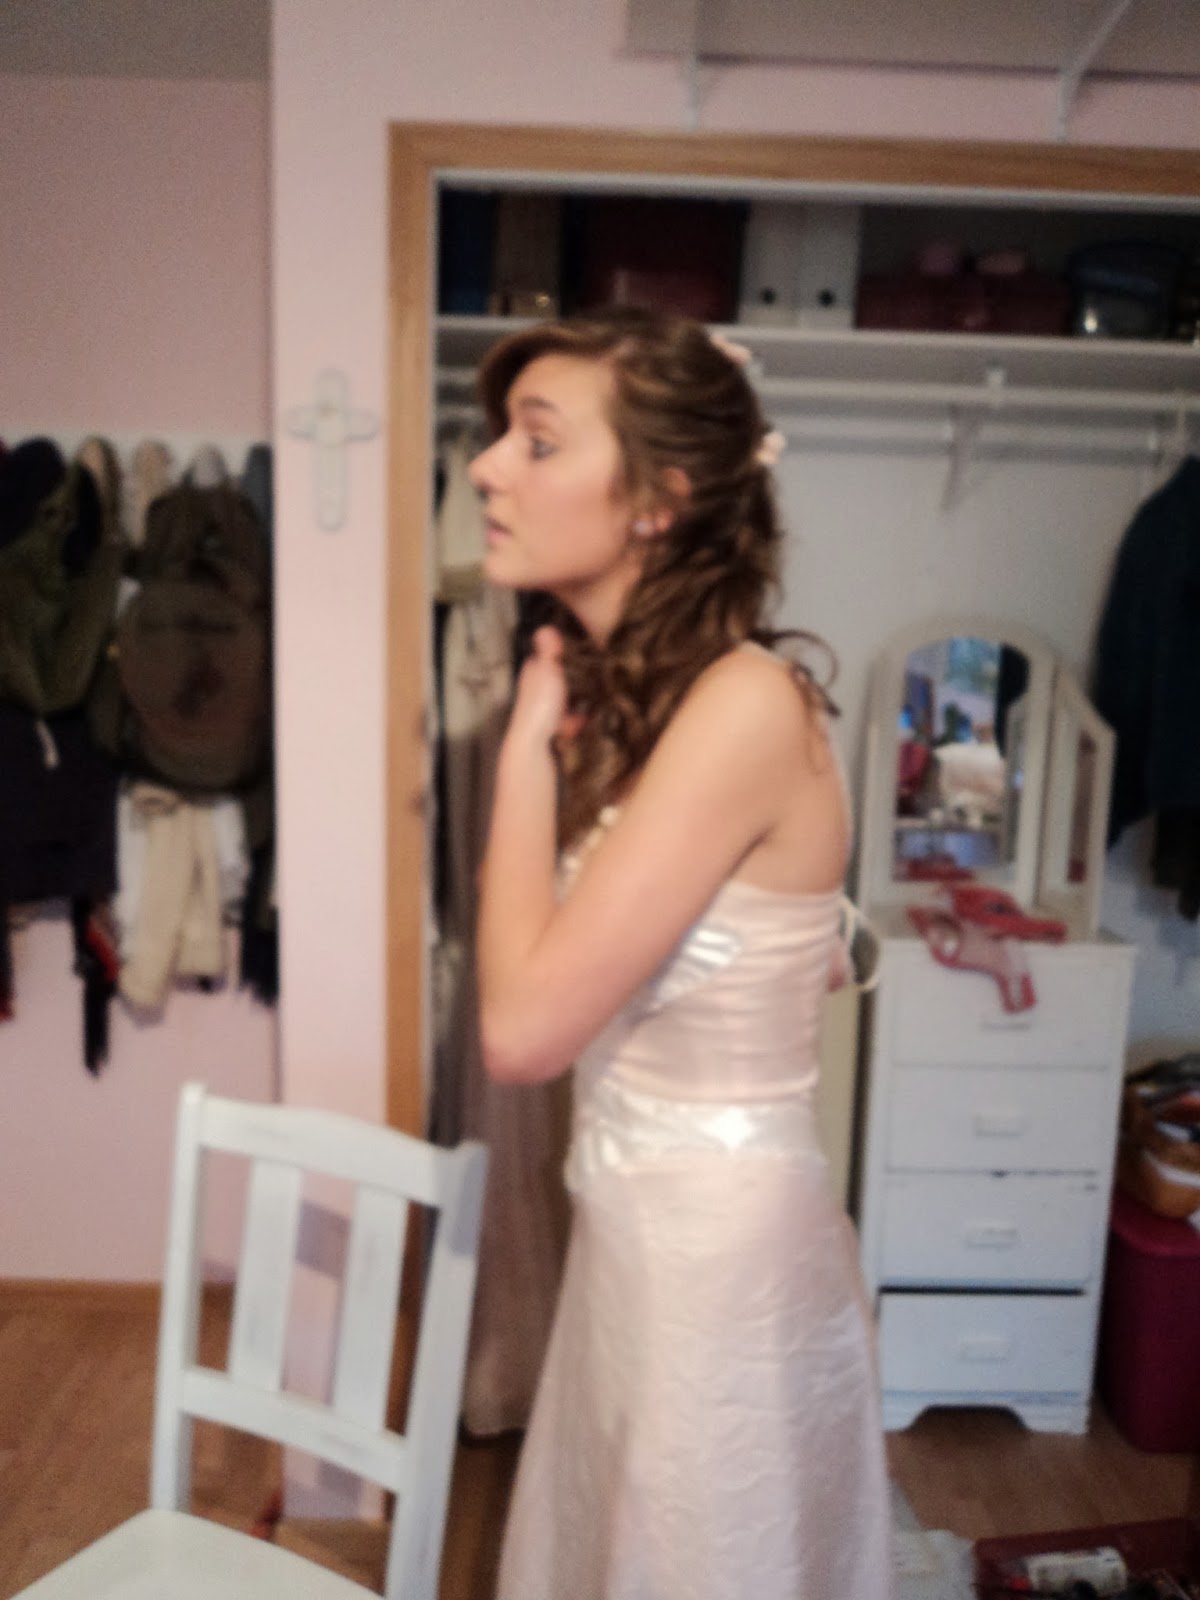
I was honestly not expecting to get photos from the Belle Gold dress I did last year, but yesterday I opened up my work email and was ecstatic to get the following two photos (which my customer graciously has allowed me to share here).


This dress had been created especially with the purpose of being worn for dances, and here we get to see it on the spot! (I'm loving the Scottish garb of her partner!)


There's something else special about this gown as well. My client decided that she wanted more sparkle on the bodice, and redid the central embroidery. I have to say I don't blame her one bit - the stuff I did was rather rushed at the end to get it to her on time, and what she did here is amazing! I'm totally inspired to go overboard the next time I get a chance to replicate this dress (and  now that I have an embroidery machine that should make it easier as well). Anyhow, she did a fab job and it's so cool to see a piece I made being brought to even greater heights of gorgeousness! Can you believe this is her first such decorative project?

Thursday, March 27, 2014

The Princess Emma Swan Dress (At Last!)

Headache this week, so not a huge update, but I do have to point out the long awaited appearance of PRINCESS EMMA.

(my screencaptures from screencapped.net)


Yes. It's a dream sequence. yes. It's super weird to see Emma in a frilly dress. But man, we've been waiting 3 seasons for this! And it's a gorgeous dress that is very evocative of a swan, our Emma's motif.

Here's hoping this won't be the last appearance of Princess Emma!

Saturday, March 22, 2014

Ironing Board Cover Tutorial

When we think of sewing, we usually picture a woman sitting at a sewing machine. However, learning to iron properly is nearly as important as learning to operate a sewing machine properly when it comes to the art of fabric and thread construction. Unironed seams look sloppy and are the mark of an amateur, but crisply pressed seams will add an air of professionalism to any garment. 

As I sew constantly, my ironing board is usually a pretty permanently set up feature of my sewing room. I got this $10 board at Target when I was in college, but it was starting to show some stains from an ill-advised wax adventure and the teal just did not go with the decor I had planned for my new workspace.

The solution? Make a new ironing board cover out of the fabric I was using for the workroom curtains and other decor features. I looked up a few different tutorials online, cobbled together different suggestions and... well... keep scrolling!


Making the pattern was actually pretty easy. I'd been worried that it would be hard to fit, but that's the beauty of the drawstring construction. all I had to do was lay the board down on a folded edge and draw an overlap and seam allowance.


Easy peasy!


I serged the raw edges, then turned them under about 3/4ths of an inch all the way around.


Sewn and pressed!


I then removed the old teal cover, leaving the foam padding behind.


Other tutorials recommended using elastic, but my old cover had a nice sturdy cord that I just drew out and threaded through the seam allowance on my new cover.


I laid the cover over, making sure to position the foam evenly underneath.


I drew the cord tight, then added a ribbon across the middle, as I had noticed a tendency on the previous cover for the fabric to flip up a bit here (no such issues with the new cover!).


And voila! A gorgeous new cover, done in less than an hour. I was super pleased with how it turned out. The cotton upholstery fabric is just thick enough that I don't have to worry about the iron scorching it, as it needs the hottest heat to iron out its own wrinkles.

I love it and it really adds a nice touch to the sewing room, which is slowly coming together!

Wednesday, March 19, 2014

Red's Cloak - Ruffle Variation

We just can't get enough of our favorite cloak, can we? And no wonder. The rich red damask velvet is some of the most gorgeous fabric I have ever worked with in my life, even if it is crazy heavy and requires serging of every raw edge.

So far you have seen me do a couple of replicas of this piece from "Once Upon a Time" and all of them have been straight forwards cloaks. On the first replica I made my client and I decided not to bother with the patchwork ruffle hem of the cloak's werewolf distressing, due to added time and costs. This worked well for further replicas, until...


Somehow, I'm still not exactly sure, this one ended up too short. It was right when things were getting crazy with my wedding and Christmas and we were working with a new pattern and the end result was something I'd never had before - missing inches. 

I had a long talk with my client who was extremely gracious and understanding. We discussed several different options, and the end result was that we decided to add on the ruffle hem to get the desired length (I only charged for materials, not added time as I felt absolutely terrible about the situation).


To get the right proportions on the ruffle, I had to cut up the hem even higher. This was one of the more painful things I've done in my work.


Then it was time to create the ruffle. I wasn't able to match the fabrics from the show exactly in my limited time frame, but I did find a red velvet and a striped upholstery fabric that matched the deep jewel tones of the damask velvet. After my customer signed off on the fabrics, I started cutting them into the three tiered patchwork ruffle.


I very quickly became pretty glad that I hadn't attempted this before. It took a couple days of work and the finished ruffle was longer than my workroom.


It did look kind of amazing, though.


I was only able to snatch a few photos before sending the cloak off in the mail, where it reached my client in time for Christmas (huzzah!)


The hard work paid off and my client was very happy. I was too - although I'd have to charge a lot more for any future client who wanted this variation of the cloak.


And there we are, my very last costume created in my parents house and under my maiden name! 

Monday, March 17, 2014

Ruby Cameos! (And so does our favorite cloak!)

Guess who we got to see on OUAT last night? (3.13 Witch Hunt) 


Ruby! I just about screamed when I saw her appear. And of course, I took advantage of the chance to grap some screencaptures of some close up details of her cloak. Here you can see the binding around her arm slits.


And here you can see clearly the contrast fabric on the front (which I have not replicated in any of my cloaks, it would be very difficult to match), as well as the leather cording looping it together. (which doesn't really make structural sense with how the fabric likes to fray, but it certainly looks cool. I'd have to charge more to add this detail, so if you have a replica of this cloak in my queue, talk to me about that).


And here's just a lovely photo. I'm adoring the braid in her hair, what do you think? Were you excited to see our favorite girl in the red cloak return?

Thursday, March 13, 2014

A Look Back - Prom Dress Project from 2011

I am not entirely sure how I managed to miss posting about this dress. I think I must have gotten very busy with SOTB or something at the time.

Anyhow, this is a prom dress I created for my sister back in 2011... it's been really interesting to go back and look at how my technique has improved since then!


This is just a random design that I did that my sister happened to stumble upon and fall in love with. Which I was pretty excited about because I would totally sew all of my designs if I had the time and money. I love it when people actually commission them!


We wanted to keep it budget manageable, so we went with cheap string pearls. Which wasn't 100% ideal but worked, as you'll see later.


This was kind of a weird dress to line. On the side you can see the underskirt panel, which I sewed into the lining fabric. Not exactly how I'd do it if I were repeating the dress - I'd make the dress three layers instead of two to get a fuller skirt.


The pink fabric was pretty slippery and not stable at all... really crazy to cut out.


I had to add darts for a proper fit.


Coming together nicely!


I sewed the boning directly into the lining. Again, this would have worked a bit better with three layers instead of just two.


Loops for the lacing in back!


I had my sister wear the dress for the hemming, to get it as perfect as possible.


I had to hand tack the loops in because they were so slippery.


Here you can see the back lacing prior to the modesty panel's insertion.


Oops! Some not so lovely puckering here.


Fixing the puckering.


Modesty panel.


Tacking in the modesty panel.


All covered up!


Tacking the ribbon on. (At this point I got very busy, so my sister took over and hand stitched on the ribbon and beading).


Getting ready!


There are obviously changes I would make if I were doing the dress again, but all in all it turned out pretty snazzy and it was really special to send my sister off to prom in a dress I designed. How often do you get to do that?

Wednesday, March 12, 2014

Guys, I got an Embroidery Machine.

It's the Brother SE400, it's kind of amazing, and I adore it.


Sorry the last photo is blurry, but it's a design I did on my gym bag. (I'm going to the gym now. Yay me!)

Anyhow, I'll keep y'all updated as to how it works out. (For those who were wondering, so far the mini Janome has been working great).