Now that the coat is cut out (see Part I), it's time to begin sewing!
I do the collar and cuffs first. Velvet sheds like crazy, so I made sure to zigzag the raw edges (I didn't have my serger at this point).
As with any garment involving buttons, reinforcement is necessary. Here I use fusible interfacing. Fusible requires the use of an iron cloth (I just used a bit of linen I had laying around). I also used the iron cloth for ironing all of the velvet and corduroy exterior seams, to avoid leaving iron marks.
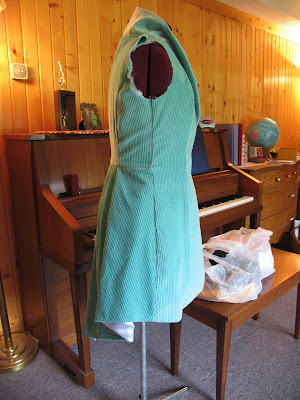
Another look at the garment, now that the main seams are all sewn.
Here and in the picture below you can see that I left the back waist seam open, to allow the pleating to be added later, once it is joined to the lining. (Otherwise the lining and the corduroy would have different pleats and it would add extra bulk that would mess up the shape of the garment.)
Hanging the corduroy on the dress form. Here is when I realized that my seam allowances were too small and had to go over all the seams again. Thankfully I caught it before I did the lining! (This is why you should always always always try a garment on constantly to make sure it fits right!)
Lining is sewn. I turn everything inside out and pin the lining to the corduroy on the dress form, so that it all follows the same gravity pull.
Pleating time! I basted the bottom waist seam corduroy and lining together, then folded in the pleats and sewed them to the top waist seam corduroy.
I then slipped the top waist seam lining over the exposed seam and stitched it down by hand.
This is a really good example of the difference between a "costume" quality and "tailor" quality garment as I define it. This is tailor quality - a costume quality rendition would either not involve lining, or would have exposed machine stitching on this seam. not a problem at all with a costume, but if you want a coat that looks as finished on the inside as it does on the outside, you'll want to pay the extra $$$ for tailor quality.
It's coming together...


No comments:
Post a Comment