Back in February I received a Kindle as a birthday present from my grandparents. However I did not want to shell out over $20 for a decent case. So I decided to experiment and make my own.
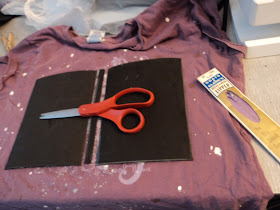
First off I cut out craft foam to protect the front, back, and non-zippered side.
I then attempted to make the case water-resistant by gluing plastic to the foam. However after two days I realized that it wasn't going to dry, as the edges had sealed off, making it impossible for the excess glue inside to dry properly. Scratch that!
I sandwiched the foam between the two layers of fabric and stitched everything in place with a zipper foot.
I choose to stitch the foam in place before securing the edges. This meant there was a lot of visible stitching in the end product. I don't really mind here, but if I were going to sell them, I would experiment a bit more to get a more professional looking product.
Next I sewed in the zipper, then attached the two loose ends. And tada! A really inexpensive Kindle case that sports the graphic from a much loved but no longer fitting t-shirt.
If you've never worked with knits before, you may find it easier to just use a woven fabric. Also, you can add further support to the case by inserting thin cardboard over the foam. Stiff sheet plastic (think milk jug grade) might also be useful here.
Total cost of this project? Depending on how much you pay for the foam, zipper and fabric, not more than $5.00. Because I bought the foam in bulk, the zipper was from a garage sale bargain, and the t-shirt was going to get tossed anyhow, my total expenses were probably less than $.50.
How much time? Minus the plastic and glue fiasco, it took me less than an hour.
I'm hoping to apply this design to other cases (camera, laptop, etc) and work out some of the kinks. I'll keep you posted!


Would you mind if I pinned this on Pinterest?
ReplyDeleteGo right ahead!
ReplyDelete