Friday, July 25, 2014

How I Almost Gave Up Making Costumes


This is the story of how I almost stopped making costume commissions for others.

I'm going to be honest, this has been a brutally hard story both to live and to write. I believe in transparency, and it is only fair to my long-suffering and gracious client that I be open about this saga. But that doesn't make it any easier to share.


First off, let's admire the costume. That is a gorgeous costume. Something that simultaneously makes me go "how did I ever agree to make that?" and also "I am so proud that I made that." Let's be clear, as it is, the costume is elaborate, but not, by any means, the craziest costume I've ever taken on. (Padme's Wedding dress was much crazier.) It's got a lot in common with the Tudor England costumes that got me into costumer in the first place and it was really fun to dip back into my roots.


Yes, friend, I, naive new owner of an awesome embroidery machine, agreed to embroidery purple flowers all over the fabric. I knew it would be intense, but I did not anticipate how intense. 

Each flower took approximately 15 minutes to stitch, and there were about 30 flowers on each of the four skirt panels, plus about 40 more on the bodice. In addition, there was time required for bobbin winding, rehooping for each design, fixing breakdowns with the machine, and clipping 8 threads on each flower. I estimate close to 50 hours of time went into doing the embroidery! (Thankfully I could work on other things while the machine was stitching, but I had to be near it in case the thread snarled). The Machine in Action.

(If I ever embroider something like this again, it'll have to be ordered a year in advance and the customer must be prepared to pay a heck of a lot for it)

As you can imagine, this resulted in the dress taking much, much longer than originally planned. Which meant when another BIG issue came up, we didn't have time to do much about it. 

.

So what was the big problem? Well, as you can see from above, my customer was plus-sized. Not tremendously so, but enough that even my "large" dress form would need significant padding to assume her figure. I'd worked with plus-sized customers before and wasn't anticipating too many unusual issues - I even had her send me out a coat of her own to draft the Regina pattern from.

Unfortunately, when padding out my dress form, I tried something new. Instead of using fabric (heavy!) I wrapped batting really tightly around the form (much lighter!). I thought this would make the form hold it's weight better and not sink down the pole. Well, that part worked, and I didn't lose vertical inches. However, over the three months it ended up taking to create the costume, the padding compressed. It happened so slowly that I didn't notice it until...

...the day I was sending it in and was measuring out the bodice waist to gather in the skirt waistband.

4 inches had been lost.

4 INCHES.

Guys, this was the rock bottom of my sewing career. To lose one inch would be mortifying, to lose four was... the apocalypse, to put it mildly.

In a situation like this, offering a full refund just doesn't cut it on either side. This isn't a TV you're ordering off of Amazon that you can exchange if it's broken. It's a dream. Someone's vision of being a queen for a day. Gone, with very little that can be done.

All I can say is that my client is the dearest, kindest, most patient woman in the world and decided that she wanted the dress anyhow, even if she could never wear it. Her graciousness was a response I certainly did not deserve and can never hope to repay. Her empathy helped to give my shattered confidence the ability to look to the future again.

I love costuming. It's a part of my creative soul. To give it up would be devastating. Yet for several hours I wondered "how can I ever make another costume if this has happened to me? How can I take that risk?"

How indeed?

I must remind myself that I had no reason to believe this would happen. I'd never had a padded form collapse like this. Now that this has happened, it never will again. Even so, I will measure compulsively going forwards. The inches don't lie, but the eye can.

I must remind myself that I learn from my mistakes. Last year I had two (much smaller!) fit issues that really came because I was relying too much on my assistants during the craziness of being sick (head. gushing. blood) and planning a wedding. Since then I have cut out 90% of assistant help and weaned my schedule down to only what I, personally, can realistically handle. This has eliminated the stress on my part of worrying about things slipping by if I'm not watching every stitch and cut and measurement.

Note: I am NOT blaming any of those mistakes on my assistants, because they were following my orders under the level of skill they had and I knew that they had. This was due to my own inability to oversee as much as they needed and I took every step I could to fix things for my customers.

What I didn't know is that, even doing everything myself, if I'm trying out a new method of anything, I have to check and double check and triple check. If it's a new technique, it's not tested and true, and it could go wrong. It needs more care.

Going forwards this means that when I next open the queue, I'm going to be taking on smaller projects, preferably ones I've done before. I need to go slower, take more time, and make sure that I can give each piece the care it needs to meet the standards of my customer and myself.

I will not be taking on any commissions that I cannot reasonably set my dress form for. If possible, I am hoping to send muslins of tricky fitting garments to the customers early on in the process to ascertain correct fit. This will add more time, but hopefully less stress on both ends.

This also means that I will be not be opening my queue for a few more weeks yet, as I want to get the next few projects I have on my list properly done without being rushed or distracted.

It is of utmost importance to me that the items I send out meet not just YOUR requirements, but my own standards of quality.

Going back to the Queen Regina dress, the really crazy thing is that, apart from the 4 INCHES, the dress turned out kind of amazing. If I had known to check the measurements and fixed the issue early on, this would have been THE costume of my career so far. Which makes the whole thing that much sadder.

I wanted to get this whole tragic story told first so that I can share the actual construction photos with the focus on what was done right. There is a lot on the dress that I am tremendously proud of and a lot of techniques I used that I hope will be useful to my fellow costumers.

I am far from a perfect seamstress. But costuming is my joy, and fulfilling the cosplay dreams of others brings me so much happiness.Going forwards I hope to provide better service and better costumes.

UPDATE 7/26/2014 - My customer just sent me a photo of her wearing the dress at SDCC!!! Apparently she was able to find a local seamstress to perform some alterations and get the dress to fit. SO THRILLED! I hope I'll be able to share a few of these photos at the end of the photo diary!

Check out what's coming next or just head over to Part 1 of the official construction photo diary.




Umbrella Embroidery

Oh dear. July currently has a total of 2 posts to its name. How tragic! I'm going to throw out the following four excuses: we've had a con, a major commission deadline (photos coming soon!), an out of town guest, and are now doing some furious house shopping.

That doesn't mean I haven't been sewing, it's just a matter of editing the photos and posting them. I'm going to start off with sharing a look at the piece I embroidered for my mother for her birthday, back in April.


More costume and clothing goodness coming soon, I promise!

Sunday, July 13, 2014

Fibers and Dyes eye each other warily.


Something else you should know about dyes. Different dyes are meant for different fibers, and even while you can theoretically use the Fiber Reactive Dye, it's not necessarily going to end up the color you planned. Above are a skein of handspun wool and a silk scarf, BOTH dyed from the same container of moss green... one of these things is not like the other!

Time to get some acid dyes for wool...

Monday, July 7, 2014

Steampunk Pirates and Disney goes Hipster


(Due to the number of photos in this post, I've kept them all at a smaller size. Click any one of them to view it full-screen)

Thanks to Meg for camera use, Andy for photographing us, and Claire for assisting in staging


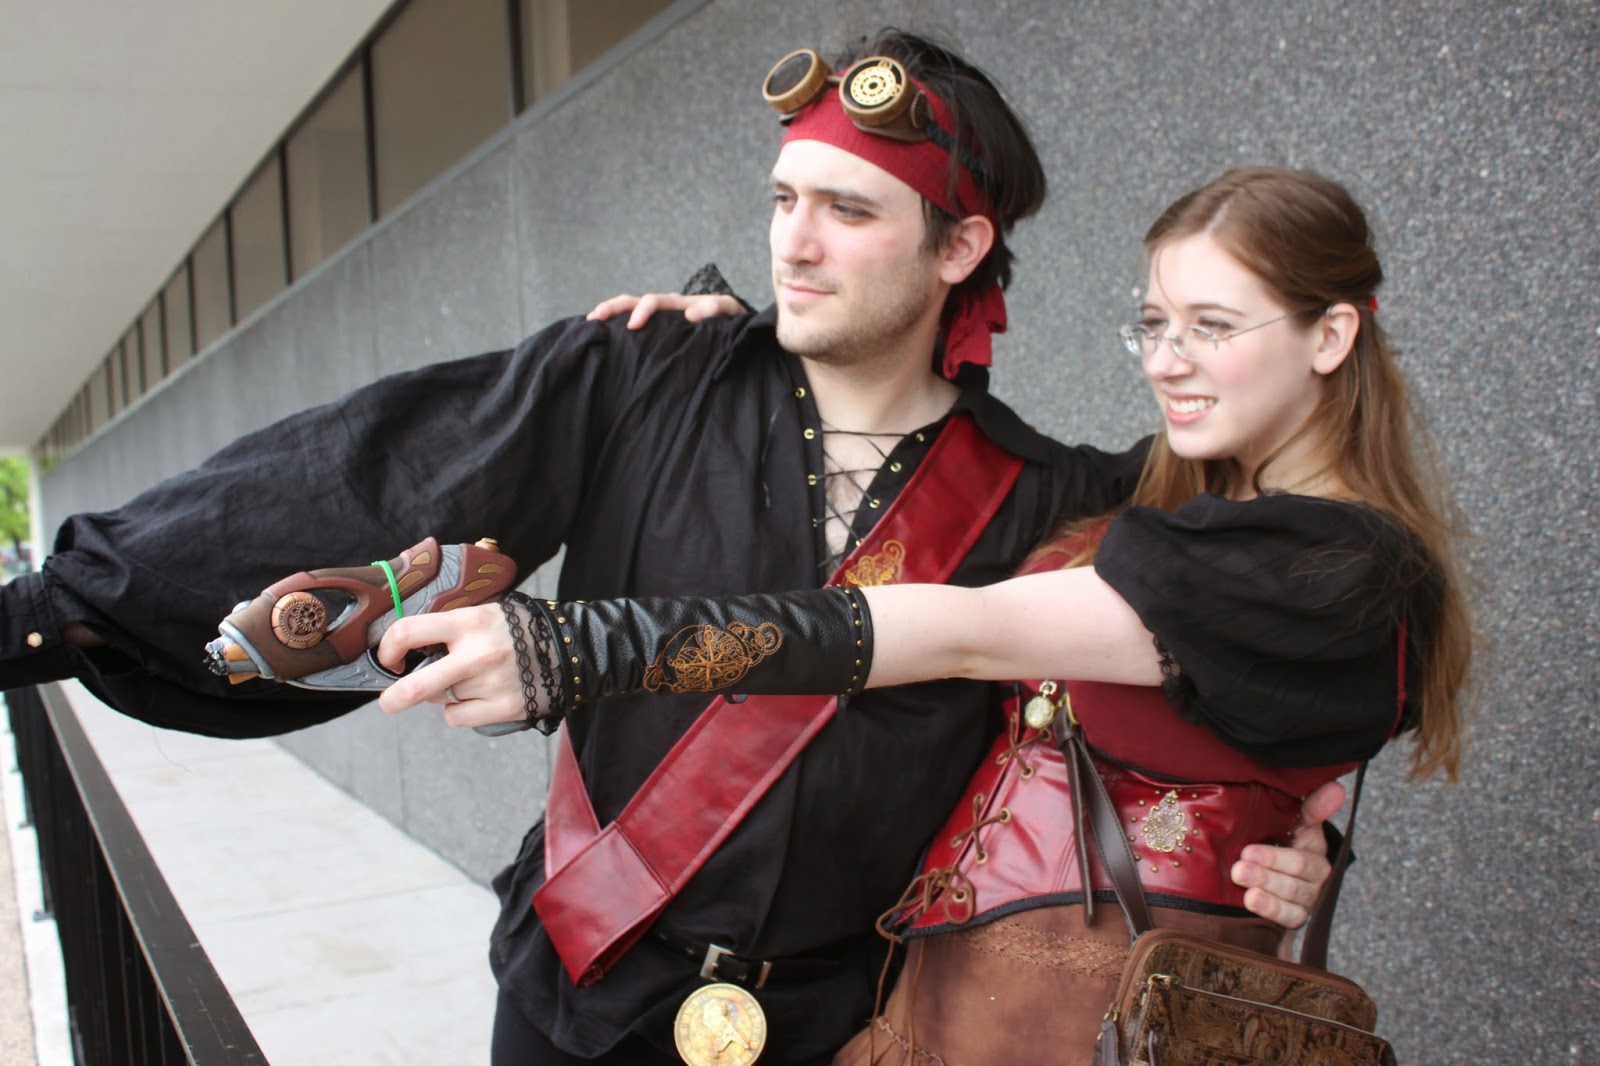
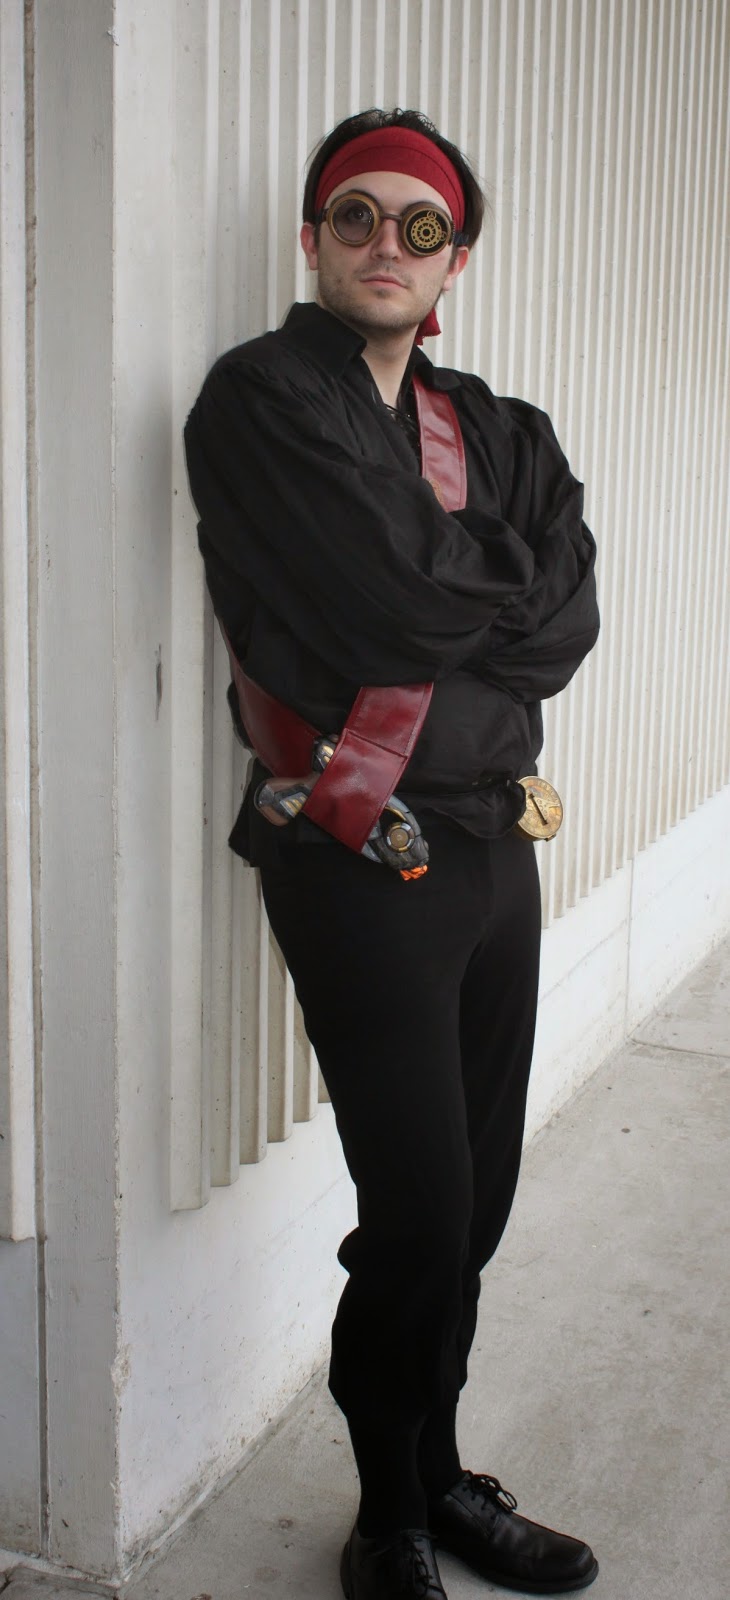
Last year, my pirate loving husband surveyed the awesome steampunk on display at the con and declared "Next year I'd really like to do steampunk pirate costumes."

So we did.


Our friend Meg, who is also huge into steampunk (Particularly Steampowered Giraffe), decided to join us for the ride.


We put a TON of time into making our costumes, working on it after hours for months. And even then we did not complete all of the pieces we were hoping for. Nathan and I both got material for vests but simply ran out of time. We decided Nathan's costume looked fine without a vest, and I added a $2 cami from Savers to round out my ensemble.


Our guns were created as follows:

#1 - we sanded down both guns with fine sandpaper (my husband made one as well although his looks quite different.) Both guns were purchased in the $1-$3 section of Target.
#2 - we spray painted the entire gun black.
#3 - we blocked out our colors, doing a couple of layers on each area to get the right opacity. We used the same paint my husband has for his miniatures, but anything from a craft store should work, as long as the base coat is good at sticking to plastic.
#4 - I used a dark walnut brown paint to shade/age/distress the crevices, wiping away excess with a rag.
#5 - we glued on the little steampunk gears and I added a bit of red pleather to my handle, using glue and paint to blend in the edges. 
#6 - touched up paint and did final distressing.


Nathan's goggles followed a similar process, being cheap welding goggles from Amazon.


Nathan sewed nearly the entirety of his shirt himself, this being his first real project. I assisted with the instructions, some of the cutting out, and sewing the buttonholes. Otherwise it is all him!


The compass/sundial was my Christmas gift to Nathan last year, which I found on Etsy. The leather cuff was a piece we picked up the first day of CONvergence in the dealer's hall. Just $5!


We dug into my stash of pleather to get varying textures, and also utilized my embroidery machine and the wonderful designs at Urban Threads.


My skirt was actually one I've had for quite some time, and we jazzed it up with some embroidery at the hem (I don't think we got any good photos of that, however.)


My watch locket was a gift from my brother, Matt. :)


The purse was something I picked up at Savers and it ended up being the perfect touch for this cosplay. I could wear my essentials on me without something that clashed!


My vambraces were very simple trapezoids, with a bit of lace and stud embellishment. I used the dragonfly embroidery design to decorate one, while utilizing a nautical rose for the other. All of the studs and the eyelets were applied by Nathan.


My blouse was a pretty simple gathered design, with elastic in the sleeves, and ribbon sewn and gathered up around the neckline.


Nathan's headwrap is actually the snipped off legs of a pair of tights that kept ripping. I was glad to donate them to the cause and they worked marvelously!


We had so much fun.


The Captain and First Mate of The Clockwork Dragonfly!


(UPDATE 2016 - Check out further evolutions of these costumes here!) 


Saturday we went simpler with a Hipster Disney theme - for which I finally capitulated and cut my hair! (Nathan has been gently indicating for awhile that he'd find this a delightful style on me).


We got our glasses from Zenni Optical (which I HIGHLY recommend).


My blouse was something I just whipped up that morning, no hems or anything thanks to the knit fabric. Nathan's hat was one I'd knit him the previous winter.


Jeans were another Savers find, and the shirt was courtesy of our local Target's selection. We thought it VERY Flynn Rider.


While I was in getting my hair cut, Nathan went over to Savers and found me a frying pan! Alas, he was unable to locate a decent Pascal. :(


We were joined in our Hipsterness by Andy as Prince Phillip...


...and Claire and Meg as Aurora and Ariel respectively.


It was fun!

Monday, June 30, 2014

Let's Not Go Throwing Sewing Machines (Even If We Want To)

I've been sewing for almost 20 years and there are still times when I want to hurl the sewing machine out of the window.

Okay, I don't actually want to hurl my sewing machine anywhere, it is behaving beautifully. But I sewed two major seams wrong and URG THE FRUSTRATION! I mean, it's a fairly easy fix, it's just that they were fussy seams to do the first time around and I feel like I wasted an hour.

Bleh.

When I was younger and such things happened, my mentality was "MUST KEEP WORKING UNTIL PERFECT!" Invariably my frustration would cause me to make more mistakes which would make the frustration greater in a vicious never-ending cycle.

Finally I realized that "Hey, maybe I should just walk away, take a deep breath, do something else and come back with renewed patience."

It was like magic! Sure it's hard to walk away when I JUST WANT TO GET SOMETHING DONE and I'm on a deadline. But honestly it saves time in the long run, and definitely keeps my blood pressure down!

Lesson of the Day: When you want to do something destructive to your sewing equipment, don't. Walk away, drink some tea, eat some chocolate, tidy up the kitchen, then come back and try again.

Monday, June 23, 2014

Queen Regina Embroidery

Remember that post I wrote about how difficult it was proving to find the right fabric for Queen Regina's Black and Purple costume? Well we decided to purchase a blue and black brocade and add the purple with the help of my new embroidery machine. It has been QUITE the task - I have 1 and 1/2 skirt panels left to go and then it'll be done! 

Anyhow, I thought you might like to see my machine in action.


Video #1 is about 90 seconds and shows the start of the design. I have to press a button between the three stages, because the original design includes a color change that we don't need.

The plastic film you see covering the fabric is a water soluble stabilizer. After all of the designs are sewn, I soak the material in water and the plastic dissolves away! 


The second video is just 30 seconds long and you can see the flowers emerging.

My machine is a Brother SE 400 for Embroidery and Sewing, which I purchased from Amazon for $300 back in March. I adore it! The flower design is from iBroidery.com.

Wednesday, June 18, 2014

Who said you're too old to make-over Barbie?

Granted, it's a bit easier to explain when you have a daughter/sister/niece to use as an excuse. I just love making clothes of any size though, and Barbie's are easier to display than full size dress forms.


I picked up this lovely lady at the thrift store the other day, because I was enchanted by the rich varied red of her hair. $2.99 packaged with a horrid Bratz doll which is going right back to the thrift store! And then I got my whole purchase 25% off because it was a monday...


Anyhow, her hair was a mess, so I carefully combed it out, section by section, shampooed and conditioned it, then dipped it in boiling water to straighten it out. Look how smooth and silky it got! I wanted her curls back, however, so I used straws and bobby pins to roll it up and - yes - once again stick it into boiling water.


When her hair dried I took the curlers out and she had a lovely shiny new mop o'curls!


As you can see from this top-down view, I was able to save the narrow braid from the original hairstyle and loop it up again over the curls.


Although I hope to created something more stunning for her eventually, today I just needed something to cover poor Barbie up. So I pulled out this vintage pattern set my aunt had given me and picked the easiest design.


30 minutes later, Barbie has a cute new frock, very Rose Brier in style!


I couldn't resist sticking a little flower in her hair!


Saving and restyling dolls is addicting, but thankfully not a very expensive addiction!