Wednesday, November 29, 2017

Green Corset - Part 2


Corset-making is an intense process, but it is so cool to see the finished piece come together. Part 1 covered the initial construction and busk insertion. Part 2 will chronicle the rest of the process.


Having completed two fittings and established the proper fittings of the corset, I now needed to cover the inside seams. I made bias tape out of black satin and stitched them down.

Monday, November 27, 2017

Green Corset - Part 1


Corset-making is an art of its own. One can be a fabulous costumer, and yet know nothing about crafting corsets. I am still very much a novice in this area, but I did complete a project for a friend this past year that I am pretty proud of.


This corset is loosely Victorian in design, although I'll admit to giving it plenty of modern flare in order to make finishing the project on time manageable! And, for historical accuracy's sake, I should also point out that the Victorian era was quite a long one, with the shape of the corset changing from decade to decade. I use the term "Victorian" here only to really set it apart from the Tudor corset I did previously.


I began the project by padding out one of my dress forms to my friend's measurements. Although I would do fittings in person, making the corset was helped tremendously by having a fairly close body double.


I needed this to be a time economical project, since I knew that even with time-saving methods it would still end up being fairly involved. Therefore, the corset is only three layers thick, and thin layers at that. A gold/green brocade, a thin interfacing, and a green poly-satin lining. I knew it would be easiest to fit the corset if there was one seam per section, rather than separate seams for the brocade and lining, so I stitched all the pieces together as though each brocade and satin piece were merely the front and back of the same piece. I'm really glad I did this, because it made the fitting process so much simpler.

Thursday, November 2, 2017

Eowyn Coat


Several years ago I was given a length of textured brown fabric that struck me as being perfect for a replica of Eowyn's brown coat from "The Two Towers." I got a coat zipper and a bit of cheap brown fur and whipped the coat together. It was a little tricky to piece out all the necessary pattern sections, but I managed to pull it off! And, if I recall correctly, this was my first time working with faux fur.

However, despite the fact that I made this piece over twelve years ago, it has never been photographed! I meant to wear it during a photoshoot with my sister the other week, but the heat soared and there was no way I was wearing this ensemble in 70f weather! The coat pairs well with a medieval undertunic and surcoat in my wardrobe, but both of those pieces are made of synthetic fabrics so it is a very warm costume overall!

Perfect, however, for this past Tuesday, which was wet and frigid. It was also what I like to call "National Costume Day", and Chipolte gave out $3 burritos to those who went in costume.


No, I didn't bring the sword into Chipolte. But I had to get a few photos with it! And my Jedi Master husband, of course.

Eowyn's original costume does not include a zipper, of course, but I deliberately wanted to make a coat that had some actual practical function. I'm planning to keep it handy and see how else I can use it this year. It's quite cool to wear!

Tuesday, October 3, 2017

Sewing Photography Tips


If you are a seamstress who wants to boost your profile on social media, you need good content--and you also need pretty content. Today we are going to talk about how to take good photos that do your sewing talents justice. And don't worry, we're going to do it the economical way!

First, my personal background. I started photographing my sewing projects almost ten years ago. While I am still constantly learning more about photography, I will say that my pictures have come a long way. In this article I am going to share with you many of the tricks I've learned about photography in general, and photographing sewing projects and costumes in particular. Some of what I've learned has come from trial and error, other bits are tips from friends, and plenty of the info comes from many hours spent reading other photography tip blogs. Indeed, I would particularly like to highlight this Sewing Photography post by Tilly and the Buttons, as it served as a significant jumping off point for many of my photographic advancements.

Monday, September 11, 2017

Why I Sew (and why I don't)


I wish that I could show you the actual video above, because it explains so much about my obsession with sewing. However I don't have access to it right now, so I'm going to explain to the best of my memory. Up there is a screenshot of me shortly before my third birthday. I am taping thread onto fabric. "What are you doing?" my mom asks. "I'm sewing," I say. "Like Wendy in Peter Pan."

The weird thing, is that I have a very strong memory of this, but it isn't in the family room, it's up in my bedroom. So the taping thread on things--that was happening a lot. I saw Wendy Darling sewing in "Peter Pan" and I desperately wanted to do whatever it was she did. 

That compulsion has never left me.

myself and my sister wearing very early creations


 I was about five or six when I was first allowed an actual needle and thread, and a year later I had convinced my mother and grandmother to give me a few lessons on the sewing machine. I utterly refused to have anything to do with patterns ("No one is going to tell ME what to do!") and progressed with learning the hard way.

Tuesday, August 1, 2017

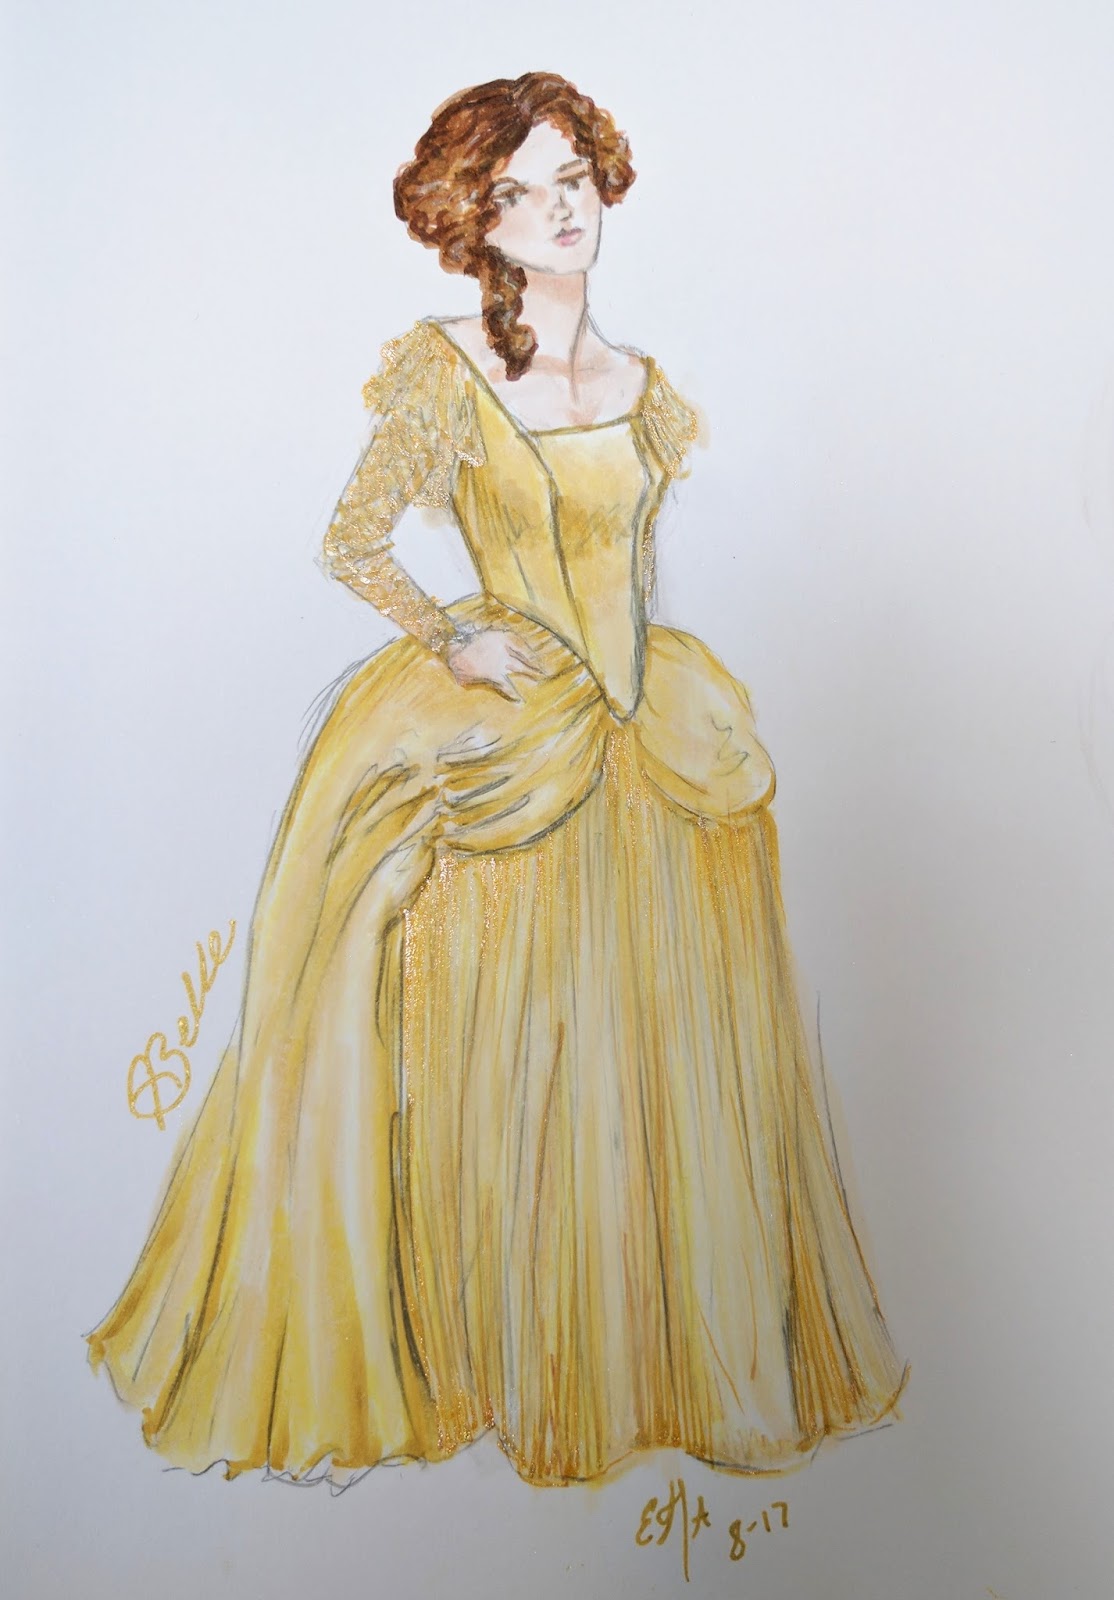
My NEW Belle Gold Gown Design

Yesterday, one of my friends sent me the link to a really excellent article discussing Belle's Gold Gown from the new Disney "Beauty and the Beast." I felt that it had a fantastic rundown of why so many people were unsatisfied with the dress that Emma Watson wore, especially in comparison to the general approval (corset aside) of Lily James' Cinderella dress.

I found myself inspired by this blog post to try my hand at my own redesign of Belle's gown, applying the principles discussed in the article.

Click Photo for Full Resolution

I really focused on structured simplicity, and dimensional texture. The largest visible surface of the gown is a smooth, creamy satin. Apart from the skirt gathers and the structure panels, this overgown is quite deceptively simple. In this, I was highly inspired by the simple lines of the infamous Red Gown from "Outlander" (I haven't seen much of the show but the costumes are gorgeous. While the Red Gown had some controversy, I felt that many of the reasons it worked for that show would also make those elements work well for Belle. And I do feel that Belle's gown didn't need to be laden with yards of frills and ruffles, as common for the period.

However, it does need some special princess details and embellishments to add depth. The Cinderella dress did such a lovely job with layering sheer fabrics in the skirt, that I felt a similar approach would work very well for Belle's undergown. The lines of it are simple, but it has several layers of sheer fabrics in shades of yellow, cream, and shimmery gold.

The sleeves were the most difficult part for me. I don't feel that bare arms work either for the weather, or the time period. No woman of good reputation would wear short sleeves in any situation at that time period, even for an evening gown. And in purely practical terms, if the hairy Beast is wearing a full coat and vest, then Belle would be absolutely freezing in that room without sleeves.

However, I've seen a lot of redesigns that put period sleeves on Belle and I never feel that they look quite right for her. This is absolutely because of all the years of seeing her in her anachronistic gold gown from the animated film! So I came up with a design that is a compromise between the two with a fantastical element. Instead of giving Belle gloves, I gave her sheer, metallic net sleeves, with some frilly lace on the shoulders that is reminiscent of both her animated gown, and the frilly lace worn at the elbows on dresses of the period. I felt this created uniquely magical "Belle" sleeves, while still fitting the requirements of time and place.

I know this redesign won't be perfect for everyone, and I may try another design at some point, but for today, I'm pretty psyched with what I came up with.

You can read my further thoughts on the 2017 Disney film here.

Friday, June 16, 2017

My thoughts on the Costumes of the 2017 "Beauty and the Beast"


First of all, to not be redundant, let's see what the internet is already saying about these costumes! In my research I was not able to access the multiple video interviews on the topic, due to my deafness and lack of subtitles on said videos. So they will unfortunately not be a part of my discussion here. However, I did find the following interesting articles:

Fashionista's wonderful interview with designer Jacqueline Durran includes a variety of interesting details, particularly in how they balanced the historical influence with the demands of the story.

People Movies also interviewed Durran, and their article includes additional details, as well as Durran's design sketches. Further design sketches were originally released on Entertainment Weekly here and are a treasure trove for those looking to understand and recreate these pieces for cosplay. While you can see more of the sketches at the above link, I wanted to share my favorite here. (I'm not entirely clear on whether these sketches are her original designs, or drawings of the finished product done for promotional purposes. If anyone can clarify this, I'd be grateful for the details!)